Category Archives: Blogging

How long can 16mm Flat Dripper Tape typically last in the field before needing replacement?

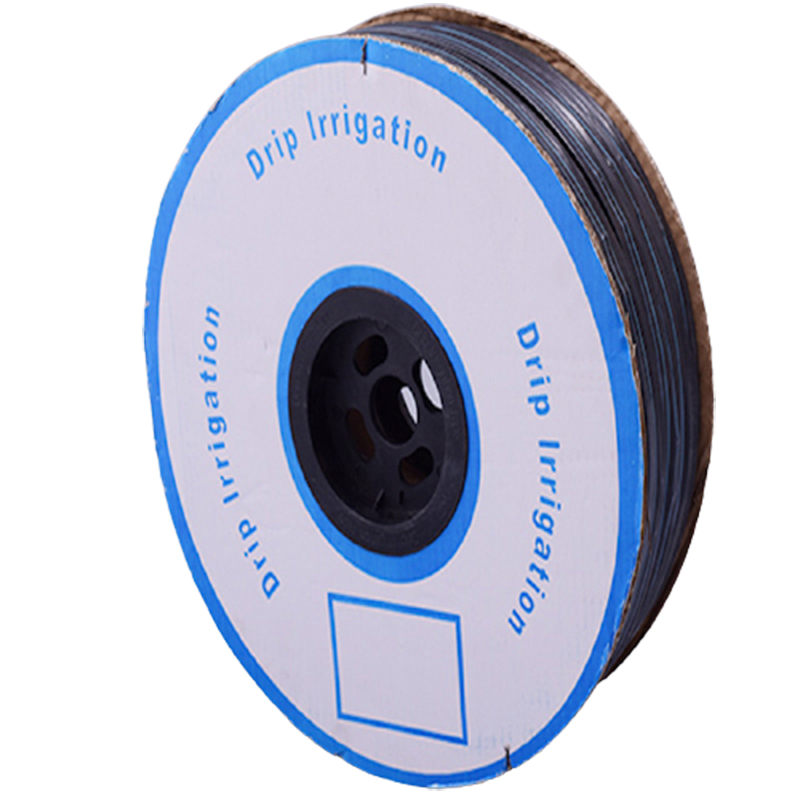
The lifespan of 16mm Flat Dripper Tape can vary depending on several factors, including the quality of the tape, environmental conditions, and maintenance. On average, a well-maintained 16mm Flat Dripper Tape can last anywhere from 3 to 10 years in the field before needing replacement.

Here are some key factors that can influence the longevity of the tape:

  1. Tape Quality: The quality of the materials and manufacturing processes used in the production of the tape can significantly impact its durability. Higher-quality tapes tend to last longer.
  2. Environmental Conditions: Environmental factors such as exposure to UV radiation, extreme temperatures, and soil conditions can affect the tape’s longevity. UV-resistant tapes are designed to withstand prolonged exposure to sunlight.
  3. Water Quality: The quality of the water being delivered through the tape can also play a role. Water with high levels of minerals or contaminants may lead to clogging and reduced lifespan.
  4. Maintenance: Regular maintenance, including flushing the system to prevent clogging and cleaning the drippers, can extend the lifespan of the tape. Proper storage during the off-season can also help prevent damage.
  5. Tape Depth: The depth at which the tape is buried can affect its lifespan. Subsurface placement may protect the tape from certain environmental factors and physical damage.

It’s important to follow the manufacturer’s recommendations and guidelines for the specific 16mm Flat Dripper Tape you are using to maximize its lifespan. Additionally, routine inspections and proactive maintenance can help ensure that the tape remains in good working condition for as long as possible.

What maintenance is required to ensure the efficient operation of 16mm Flat Dripper Tape?

To ensure the efficient operation of 16mm Flat Dripper Tape in your irrigation system, regular maintenance is essential.

Here are some maintenance tasks and practices that can help prolong the lifespan and optimize the performance of the tape:

  1. Periodic Inspections: Regularly inspect the entire system to identify any visible issues, such as leaks, clogs, or damage to the tape.
  2. Flushing: Periodically flush the tape and the entire irrigation system to remove any sediment, minerals, or debris that may accumulate inside. Flushing helps prevent clogging and maintains water flow.
  3. Cleaning Drippers: Check and clean the drippers or emitters to remove any debris or mineral deposits that can obstruct water flow. 16mm Flat Dripper Tape Use a soft brush or a cleaning solution recommended by the manufacturer.
  4. Repairing Leaks: Promptly address any leaks or damaged sections of the tape. Replace or repair damaged portions to prevent water wastage.
  5. Pressure Regulation: Ensure that the water pressure in the system is within the recommended range for the specific 16mm Flat Dripper Tape you are using. Excessive pressure can cause damage and reduce efficiency.
  6. Filter Maintenance: Clean and maintain the system’s filters regularly to prevent them from becoming clogged. Clean or replace filters as needed.
  7. Winterization: If you’re in an area with freezing temperatures, take measures to protect the tape from damage. This may involve draining the system or using insulated covers.
  8. Correct Installation: Ensure that the tape is properly installed, with appropriate spacing and depth. Proper installation is critical to the tape’s performance and longevity.
  9. UV Protection: If the tape is exposed to direct sunlight, consider using UV-resistant tape or covering it with a protective material to prevent UV degradation.
  10. Record Keeping: Keep records of maintenance activities, including flushing schedules, repairs, and replacements, to help with future maintenance planning and troubleshooting.
  11. Training: Train personnel responsible for maintenance to ensure they understand the proper procedures for inspecting, cleaning, and maintaining the 16mm Flat Dripper Tape and the entire irrigation system.

By following these maintenance practices and staying proactive in caring for your irrigation system, you can maximize the efficiency and lifespan of your 16mm Flat Dripper Tape, resulting in more effective and cost-efficient irrigation.

How does 2-(Chloromethyl)oxirane react with nucleophiles in various chemical reactions?

2-(Chloromethyl)oxirane, also known as chloromethyloxirane or epichlorohydrin, is a reactive compound that can participate in various chemical reactions with nucleophiles.

Here’s how it reacts with nucleophiles in different reactions:

  1. Ring Opening with Nucleophiles:
    • The most common reaction involves the ring-opening of the epoxide (oxirane) ring by a nucleophile. Nucleophiles, such as amines or thiols, attack the electrophilic carbon (the epoxide carbon), leading to the formation of a new covalent bond.
    • For example, when reacted with ammonia (NH3), 2-(Chloromethyl)oxirane yields 1-amino-2-propanol.
  2. Formation of Alcohols:
    • Reaction with water (HOH) leads to the formation of glycerol, where one nucleophilic attack opens the epoxide ring, and another nucleophilic attack leads to alcohol formation.
  3. Amino Alcohol Synthesis:
    • By reacting with both an amine and water, 2-(Chloromethyl)oxirane can yield amino alcohols.
  4. Thiol Reactions:
    • Thiol nucleophiles can also attack the epoxide ring, resulting in the formation of thioethers.
  5. Polymerization:
    • 2-(Chloromethyl)oxirane can be used as a monomer for the synthesis of various polymers, where nucleophiles, such as amines, react with multiple epoxide groups to form cross-linked polymer networks.
  6. Rearrangement Reactions:
    • Under certain conditions, the nucleophilic attack on the epoxide ring can lead to rearrangement reactions, yielding different products.
  7. Nucleophilic Substitution:
    • Nucleophiles can replace the chloride atom in 2-(Chloromethyl)oxirane, resulting in nucleophilic substitution reactions.
  8. Nucleophilic Addition:
    • In some cases, nucleophiles may add to the epoxide ring without complete ring opening, forming adducts.

The reactions of 2-(Chloromethyl)oxirane with nucleophiles are versatile and can be employed for the synthesis of various organic compounds, including alcohols, amines, thioethers, and polymers. The specific reaction and product depend on the nature of the nucleophile and reaction conditions. These reactions are widely used in organic synthesis for the preparation of various functionalized compounds.

What are the typical methods for synthesizing 2-(Chloromethyl)oxirane in the laboratory?

2-(Chloromethyl)oxirane, also known as epichlorohydrin, can be synthesized in the laboratory using various methods. One common approach involves the reaction of glycerol with a chlorinating agent. Here are typical methods for synthesizing 2-(Chloromethyl)oxirane:

  1. Glycerol Chlorination:
    • In this method, glycerol serves as the starting material. The synthesis proceeds as follows:
      • Glycerol is first chlorinated using a chlorinating agent like hydrochloric acid (HCl) or phosphorus trichloride (PCl3) in the presence of a dehydrating agent such as zinc chloride (ZnCl2).
      • The chlorination reaction replaces one of the hydroxyl groups in glycerol with a chlorine atom, forming the intermediate 3-chloro-1,2-propanediol.
      • The intermediate is then subjected to an epoxide formation step using a strong base like sodium hydroxide (NaOH) or sodium methoxide (NaOCH3). This step results in the formation of 2-(Chloromethyl)oxirane.
  2. Halohydrin Synthesis:
    • Another method for the synthesis of 2-(Chloromethyl)oxirane involves the halohydrin formation from glycerol. 2-(Chloromethyl)oxirane supplier This can be achieved through the reaction of glycerol with a chlorinating agent like thionyl chloride (SOCl2), which simultaneously introduces chlorine and forms the epoxide ring.
  3. Oxirane Formation from Epichlorohydrin:
    • An alternative method is to start with commercially available epichlorohydrin, which already contains the chloromethyl group and the epoxide ring. The epoxide can be synthesized from glycerol as described above or obtained commercially.
  4. Other Methods:
    • In addition to the methods mentioned, there are variations and alternative procedures for synthesizing 2-(Chloromethyl)oxirane, and researchers may explore various routes to meet their specific needs.

It’s important to exercise caution when working with chlorinating agents and strong bases, and to follow safety protocols and regulations for handling hazardous chemicals. The choice of method may depend on the availability of starting materials, safety considerations, and the desired scale of synthesis.

How does DBU phenol salt compare to other commonly used organic bases like DBN or DBU itself?

DBU phenol salt, 1,8-diazabicyclo[5.4.0]undec-7-ene (DBU), and 1,5-diazabicyclo[4.3.0]non-5-ene (DBN) are all commonly used organic bases in organic chemistry.

Here’s a comparison of these bases:

DBU Phenol Salt:

  • Basicity: DBU phenol salt is a strong base, similar to DBU. It is known for its high basicity, which makes it effective in a wide range of deprotonation and catalytic reactions.
  • Solubility: It is typically soluble in common organic solvents, which is advantageous in many organic reactions.
  • Applications: DBU phenol salt is often used as a base catalyst in various chemical reactions, especially in deprotection and esterification reactions.
  • Safety: Similar to other strong bases, it should be handled with care, and safety precautions should be taken when working with it.

DBU (1,8-diazabicyclo[5.4.0]undec-7-ene):

  • Basicity: DBU is highly basic and widely used as a strong organic base. It can effectively deprotonate various acidic compounds.
  • Steric Hindrance: Due to its larger structure (5,4,0), it may exhibit steric hindrance in some reactions.
  • Applications: DBU is commonly used as a base in a variety of chemical reactions, including nucleophilic substitutions, deprotonations, and condensations.
  • Selectivity: It can be less selective in some reactions due to its high basicity and steric hindrance.

DBN (1,5-diazabicyclo[4.3.0]non-5-ene):

  • Basicity: DBN is a strong base but is generally considered slightly less basic than DBU or DBU phenol salt.
  • Steric Hindrance: It has a smaller structure (4,3,0), resulting in less steric hindrance in some reactions.
  • Applications: DBN is often chosen for reactions that require selective deprotonation and where steric hindrance or over-deprotonation could be issues.

The choice between these bases depends on the specific requirements of a given reaction. DBU and DBU phenol salt are stronger and highly basic, DBU phenol salt supplier while DBN, being slightly less basic and smaller in size, may be preferred in reactions where steric factors or selectivity are important considerations. Researchers select the base that best fits the needs of their synthesis to achieve the desired outcome.

How is DBU phenol salt used to deprotect functional groups in organic chemistry?

DBU phenol salt can be used as a deprotecting agent in organic chemistry to remove certain protective groups from functional groups, allowing access to the underlying reactive site. This is particularly common in peptide chemistry. Here’s how DBU phenol salt is used for deprotection:

  1. Choice of Protective Group: In organic synthesis, certain functional groups are temporarily protected to prevent unwanted reactions during the synthesis. For example, the Fmoc (9-fluorenylmethyloxycarbonyl) group is used to protect the amino group in peptide synthesis.
  2. Reaction Setup: The compound with the protective group is typically treated with a solution of DBU phenol salt. The reaction is often conducted in an appropriate solvent, such as DMF (dimethylformamide) or DCM (dichloromethane).
  3. Deprotection Conditions: The reaction is carried out under specific conditions, including temperature and reaction time, depending on the deprotection requirements and the protecting group used.
  4. Removal of Protective Group: DBU phenol salt, acting as a strong base, deprotonates the acidic hydrogen on the protective group. In the case of Fmoc deprotection, this removes the Fmoc group, revealing the free amino group on the molecule.
  5. Workup: After the deprotection reaction, the reaction mixture is usually quenched or worked up to neutralize any excess DBU phenol salt and adjust the pH if necessary.
  6. Isolation and Purification: The deprotected product is then isolated and purified using various techniques, such as chromatography, to obtain the desired compound.

DBU phenol salt is particularly effective for deprotection because of its strong basicity and its ability to remove various protecting groups. However, it’s essential to choose the right conditions and solvents for the specific reaction and protecting group to achieve high yields and purity in organic synthesis.

What safety precautions should be followed when using 16-gauge angled finish nails?

When using 16-gauge angled finish nails, it’s important to follow proper safety precautions to prevent accidents and ensure personal safety.

Here are some key safety guidelines to consider:

Wear Protective Gear: Always wear appropriate personal protective equipment (PPE) when working with 16-gauge angled finish nails. This includes safety glasses or goggles to protect your eyes from flying debris and gloves to protect your hands.

Use a Nail Gun Safely: If you’re using a nail gun to drive the nails, familiarize yourself with the manufacturer’s instructions and recommendations. Follow proper handling procedures, such as keeping your finger off the trigger until you’re ready to fire, and never point the nail gun at yourself or others.

Maintain a Secure Work Area: Ensure that your work area is clean, well-lit, and free of clutter. Remove any tripping hazards and keep bystanders, especially children and pets, at a safe distance from the work area.

Check for Electrical Hazards: Before starting any nailing task, be aware of electrical wiring or other utilities hidden behind the work surface. Use a stud finder or other appropriate tools to identify potential hazards and avoid accidentally driving nails into electrical wires or pipes.

Secure the Workpiece: Make sure the workpiece is securely clamped or held in place to prevent movement during nailing. This will help avoid accidental slips or misfires that could lead to injuries.

Properly Position Hands: Keep your hands clear of the nailing path and away from the nail gun’s muzzle. Avoid placing your fingers or palm in front of the nail gun’s contact element or the line of fire.

Be Mindful of Recoil: Nail guns can have recoil or kickback when fired. Maintain a firm grip on the nail gun and be prepared for the recoil force to prevent loss of control.

Avoid Over-Driving Nails: Ensure that the depth setting on the nail gun is adjusted correctly to avoid over-driving nails. Over-driving can cause damage to the workpiece or result in the nail protruding through the surface.

Handle Nails with Care: Handle the nails with caution, especially the sharp tips. Avoid dropping or tossing nails, as they can cause injuries if stepped on or if they bounce and hit you or others.

Store Nails Properly: When not in use, store nails in a secure and organized manner. Use appropriate containers or cases designed for nail storage to prevent accidental spills or injuries.

Remember, these safety precautions are general guidelines, and it’s important to consult the specific safety guidelines provided by the manufacturer of the nail gun and any other tools you are using. Always prioritize your safety and take necessary precautions to prevent accidents while working with 16-gauge angled finish nails.

What are 16-gauge angled finish nails primarily used for in construction and woodworking?

16-gauge angled finish nails are primarily used for construction and woodworking applications that require a strong and discreet fastening method.

Some common uses for 16-gauge angled finish nails include:

Trim Installation: These nails are commonly used for installing baseboards, crown molding, door and window casings, chair railings, and other decorative trim elements. 16 gauge angled finish nails The angled design allows for easier access to tight corners and helps create a clean, finished look.

Cabinet and Furniture Assembly: 16-gauge angled finish nails are suitable for joining cabinet components and assembling furniture pieces. They provide a secure and hidden fastening method, allowing for a professional and seamless appearance.

Woodworking Projects: Whether it’s building custom cabinetry, crafting wooden boxes, or constructing small woodworking projects, 16-gauge angled finish nails are often used to join pieces of wood together. Their holding power and discreet installation make them a popular choice in woodworking applications.

Interior Finish Work: From installing wainscoting to attaching wood paneling or beadboard, 16-gauge angled finish nails are frequently used for interior finish work. They offer a reliable and inconspicuous fastening solution for creating a polished and refined interior appearance.

Staircase Construction: When building or repairing staircases, 16-gauge angled finish nails can be used to attach risers, treads, and other components. Their strength and angled design make them suitable for securing these structural elements securely.

Flooring Installation: In certain flooring applications, such as installing hardwood flooring or engineered wood flooring, 16-gauge angled finish nails can be used to fasten the boards to the subfloor, providing a secure and visually appealing installation.

Paneling and Wall Coverings: 16-gauge angled finish nails are often employed to attach wood paneling, wall coverings, or decorative wall tiles. The nails can be driven discreetly into the panels, ensuring a strong and hidden attachment.

Exterior Trim: While 16-gauge angled finish nails are primarily used for interior applications, they can also be utilized for exterior trim work in certain cases, such as attaching trim boards around windows or doors. However, it’s important to ensure that the nails and the fastening method are appropriate for exterior use and can withstand outdoor conditions.

These are just a few examples of the applications where 16-gauge angled finish nails are commonly employed. Their versatility, strength, and ability to create a clean, finished appearance make them a preferred choice for various construction and woodworking projects.

How do metal buttons for jeans contribute to the durability and longevity of the garment?

Metal buttons for jeans play a significant role in enhancing the durability and longevity of the garment in the following ways:

Secure Closure: Metal buttons provide a secure closure for jeans, ensuring that the waistband and fly remain fastened. This prevents accidental openings or the need for constant readjustment, contributing to the overall durability and functionality of the garment.

Strength and Resistance: Metal buttons are typically made from sturdy materials such as brass, zinc alloy, or stainless steel. These metals offer strength and resistance to wear and tear, allowing the buttons to withstand regular use and repeated fastening and unfastening without easily breaking or deforming.

Enhanced Fastening: Metal buttons often feature a shank or a loop on the backside, which provides additional reinforcement when attaching them to the fabric. This secure attachment helps prevent buttons from pulling through the fabric or becoming loose, increasing the longevity of the garment.

Durability in Washing: Metal buttons are generally resistant to the harsh conditions of machine washing and drying. They can withstand exposure to water, detergents, and high temperatures without corroding or deteriorating. This durability ensures that the buttons remain intact, maintaining the functionality of the jeans even after multiple wash cycles.

Abrasion Resistance: Metal buttons are less prone to abrasion compared to buttons made of plastic or other materials. The smooth and solid surface of metal buttons minimizes friction and rubbing against the fabric, reducing the risk of wear and tear or surface damage over time.

Timeless Aesthetics: Metal buttons for jeans often have a classic and timeless appearance that can complement various denim styles and endure changing fashion trends. metal button for jeans Their enduring aesthetic appeal reduces the likelihood of needing to replace buttons due to style obsolescence, further extending the lifespan of the jeans.

Repair and Replacement: In the event that a button becomes damaged or needs replacement, metal buttons are generally easier to repair or replace compared to buttons made of other materials. They can be removed and reattached without causing significant damage to the fabric, facilitating button replacement and prolonging the usability of the garment.

By providing secure closure, strength, resistance to wear and tear, durability in washing, and timeless aesthetics, metal buttons for jeans contribute to the overall durability and longevity of the garment. They are designed to withstand the demands of everyday use and maintain their functionality and appearance over an extended period, ensuring that jeans can be enjoyed for a longer period before needing repairs or replacements.

What types of metals are commonly used in the production of metal buttons for jeans?

Several types of metals are commonly used in the production of metal buttons for jeans. The choice of metal depends on factors such as durability, aesthetics, and cost.

Here are some of the commonly used metals:

Brass: Brass is a popular choice for metal buttons due to its durability, corrosion resistance, and malleability. It has a warm, golden hue that adds a classic and stylish look to jeans.

Zinc Alloy: Zinc alloy, often referred to as Zamak, is another commonly used metal in button production. It is a versatile material that can be easily molded into various shapes and designs. Zinc alloy buttons are known for their strength, lightweight nature, and affordability.

Stainless Steel: Stainless steel buttons are highly durable and resistant to corrosion, making them suitable for jeans that undergo frequent washing or exposure to moisture. They have a sleek and modern appearance.

Aluminum: Aluminum buttons are lightweight and corrosion-resistant. They are often used in jeans where weight reduction is desired, such as in lightweight or stretch denim. metal button for jeans Aluminum buttons can be anodized to achieve different colors.

Copper: Copper buttons offer a distinctive reddish-brown tone and are known for their excellent conductivity and antimicrobial properties. They are less commonly used in button production but can add a unique touch to denim garments.

Nickel: Nickel is sometimes used as a base metal for plating buttons. Nickel-plated buttons provide a shiny and polished appearance. However, due to concerns regarding nickel allergies, nickel-free alternatives are becoming more prevalent in the market.

Pewter: Pewter is a soft and versatile metal alloy that can be easily shaped and engraved. Pewter buttons often have an antique or rustic appearance, adding a vintage charm to jeans.

It’s worth noting that some metal buttons may undergo additional treatments or finishes, such as electroplating or painting, to enhance their appearance or provide specific colors or textures.

The choice of metal for jeans buttons depends on factors such as design preferences, desired aesthetics, durability requirements, and budget considerations. Each metal offers its own unique characteristics and contributes to the overall look and functionality of the buttons on jeans.

Do metal tags with logo for clothing ever cause discomfort for the wearer?

Metal tags with logos for clothing generally do not cause discomfort for most wearers. However, in some cases, individuals with sensitive skin or those who are particularly sensitive to texture or pressure may experience mild discomfort or irritation from metal tags. Here are a few factors to consider regarding potential discomfort:

Placement and Size:

Metal tags that are large, rigid, or placed in areas where they come into frequent contact with the skin, such as the back of the neck or waistband, may cause irritation for some individuals. The size, shape, and location of the tag can impact its potential discomfort.

Fabric Protection:

To mitigate any discomfort, clothing manufacturers often take measures to ensure that the metal tags do not come into direct contact with the skin. They may sew a layer of fabric or use a barrier material between the metal tag and the wearer’s skin to provide a buffer and minimize irritation.

Allergies or Sensitivities:

Some individuals may have allergies or sensitivities to certain metals, such as nickel, which is commonly used in metal tags. In such cases, direct contact with the metal tag could cause skin irritation or an allergic reaction. Hypoallergenic or nickel-free options may be available for individuals with known sensitivities.

Customization Options:

Clothing brands often offer customization options, allowing customers to remove or replace the metal tags if they find them uncomfortable or undesirable. This gives wearers the flexibility to adapt their clothing to their preferences and comfort levels.

To address potential discomfort, it is advisable for individuals with concerns to consider the clothing’s construction, material choices, and customization options before purchasing. Additionally, if discomfort or irritation persists, it is recommended to consult with a dermatologist or allergist for personalized advice and guidance.

How do PVC coated barbed fences provide security and deter intruders?

PVC coated barbed fences are effective security barriers that provide deterrence against intruders.

Here are several ways in which these fences enhance security:

Physical Deterrence: The presence of barbed wire itself acts as a physical deterrent. The sharp barbs on the wire serve as a visible barrier, signaling that access is restricted and discouraging potential intruders from attempting to breach the fence. The risk of injury or entanglement serves as a strong deterrent.

Perimeter Protection: PVC coated barbed fences are commonly installed along the perimeter of properties, whether residential, commercial, or industrial. They create a physical boundary that defines the property’s limits and helps prevent unauthorized entry. The visual presence of a sturdy and well-maintained fence acts as a psychological deterrent, signaling that the property is protected.

Increased Difficulty of Breach: PVC coating provides an additional layer of protection to the barbed wire. The PVC coating not only improves the durability and longevity of the wire but also makes it more difficult for intruders to cut or climb over the fence. The coating adds a smooth layer that reduces the risk of injury from accidental contact while maintaining the sharpness and effectiveness of the barbs.

Quick Installation and Versatility: PVC coated barbed wire fences are relatively easy to install and can be adapted to different terrains and property layouts. They can be affixed to various types of fencing materials, such as chain-link fences or welded mesh panels, to enhance security. This versatility allows for cost-effective and efficient installation on a wide range of properties.

Cost-Effective Security Solution: PVC coated barbed wire fences are often considered a cost-effective security solution compared to other high-tech and sophisticated security systems. They offer a visible deterrent and physical barrier at a comparatively lower cost. This makes them a practical choice for securing large areas or properties with budget constraints.

Serves as a Secondary Layer of Security: PVC coated barbed wire fences can be used in conjunction with other security measures, such as CCTV cameras, motion sensors, or access control systems. By incorporating multiple layers of security, including physical barriers, alarms, and surveillance, the overall security effectiveness is enhanced, making it more challenging for intruders to breach the premises.

It’s important to note that local regulations and legal requirements regarding the use of PVC coated barbed wire fences may vary. china pvc coated barbed fence It is advisable to consult local authorities and professionals in security systems and fencing to ensure compliance with regulations and to determine the most suitable security solution for specific needs.

What maintenance is required for PVC coated barbed fences?

PVC coated barbed fences require regular maintenance to ensure their effectiveness and longevity.

Here are some maintenance tasks typically associated with PVC coated barbed fences:

Regular Inspections: Perform regular visual inspections of the fence to identify any signs of damage, such as broken wires, loose barbs, or areas where the PVC coating has worn off. Inspect the fence line and posts to ensure they are secure and in good condition.

Cleaning: Periodically clean the PVC coated barbed fence to remove dirt, debris, and other contaminants. Use a mild detergent or soap solution and a soft brush or cloth to gently scrub the fence surface. Rinse thoroughly with water to remove any residue. Avoid using harsh chemicals or abrasive materials that may damage the PVC coating.

Repairing Damage: Promptly repair any damage identified during inspections. Replace broken wires, tighten loose barbs, and repair areas where the PVC coating has worn off. Use appropriate tools and materials recommended by the manufacturer to ensure proper repairs. Regular maintenance and timely repairs help maintain the fence’s security and deterrence capabilities.

Vegetation Control: Keep the area around the PVC coated barbed fence clear of vegetation. Overgrown plants, vines, or branches can exert pressure on the fence, potentially causing damage or compromising its effectiveness. Regularly trim or remove vegetation near the fence line to prevent such issues.

Rust Prevention: While PVC coating provides protection against rust and corrosion, it is essential to inspect the fence for any exposed metal areas. If any bare metal is visible due to damage or wear, treat it with an appropriate rust inhibitor or paint to prevent corrosion. Rust can weaken the structure of the fence and reduce its lifespan.

Seasonal Considerations: Consider specific maintenance tasks based on seasonal factors. For example, in areas with harsh winters, remove snow or ice buildup on the fence to prevent excessive weight and stress. In regions with high humidity or salt exposure, additional measures may be required to protect the PVC coating and metal components from degradation.

Professional Maintenance: Depending on the size and complexity of the PVC coated barbed fence, it may be beneficial to seek professional maintenance services. Professional fence contractors or maintenance providers can conduct thorough inspections, identify potential issues, and perform repairs or maintenance tasks with expertise.

It’s important to consult the manufacturer’s guidelines and recommendations for specific maintenance requirements for the PVC coated barbed fence. Following proper maintenance practices will help ensure the fence’s long-term durability, security, and effectiveness.

What is the production capacity of a typical brick making machine?

The production capacity of a typical brick making machine can vary depending on various factors such as the type of machine, its design, and the specific characteristics of the bricks being produced.

Here are some general guidelines for the production capacity of different types of brick making machines:

Manual Brick Making Machine: Manual brick making machines are usually designed for small-scale production. Their production capacity can range from a few hundred to a few thousand bricks per day, depending on the size and efficiency of the machine, as well as the skill and speed of the operator.

Semi-Automatic Brick Making Machine: Semi-automatic machines offer higher production capacities compared to manual machines. Depending on the specific model and configuration, they can produce several thousand to tens of thousands of bricks per day. The exact production capacity will depend on factors such as the machine’s speed, automation level, and the size and complexity of the bricks being produced.

Fully Automatic Brick Making Machine: Fully automatic machines are designed for large-scale production and offer the highest production capacities. These machines can produce tens of thousands to hundreds of thousands of bricks per day. The production capacity depends on factors such as the machine’s speed, the number of molds or chambers it can accommodate, and the cycle time required for each production cycle.

It’s important to note that the production capacity mentioned above is a general range, and the actual production capacity can vary significantly based on the specific machine model, operator expertise, raw material availability, and other factors. Additionally, the production capacity can be influenced by the size, shape, and complexity of the bricks being produced.

When considering the purchase or use of a brick making machine, it is advisable to consult the manufacturer or supplier for specific information regarding the production capacity of the machine model you are interested in. They can provide more accurate and detailed information based on the specific features and specifications of the machine.

What are some factors that can affect the cycle time required for each production cycle?

The cycle time required for each production cycle in a brick making machine can be influenced by several factors. Here are some key factors that can affect the cycle time:

Machine Type and Design: Different types of brick making machines have varying designs and mechanisms, which can impact the cycle time. concrete block making machinery Fully automatic machines generally have faster cycle times compared to manual or semi-automatic machines due to their higher level of automation and efficiency.

Machine Speed and Capacity: The speed and capacity of the machine play a significant role in determining the cycle time. Machines with higher production capacities tend to have shorter cycle times as they can produce more bricks per unit of time. The design and engineering of the machine also affect its operational speed and efficiency.

Brick Size and Complexity: The size and complexity of the bricks being produced can affect the cycle time. Larger or more intricate brick designs may require additional time for molding, drying, or curing processes, which can extend the overall cycle time. Similarly, the presence of special features or patterns in the bricks can increase the time required for each production cycle.

Raw Material Preparation: The time required for raw material preparation can impact the overall cycle time. Processes such as material mixing, soaking, or conditioning may be necessary depending on the specific brick-making method and raw materials used. Efficient and well-organized material preparation can help minimize the cycle time.

Curing and Drying Time: If the brick making process involves curing or drying of the bricks, the duration of these stages can affect the overall cycle time. Curing or drying times depend on factors such as the type of bricks, environmental conditions, and curing methods employed. Faster curing or drying techniques can help reduce the cycle time.

Operator Skill and Experience: The proficiency and experience of the machine operator can influence the cycle time. Skilled operators who are familiar with the machine’s operation and processes can perform tasks more efficiently, resulting in shorter cycle times. Proper training and operator expertise are essential for maximizing production efficiency.

It’s important to note that the specific impact of these factors on the cycle time can vary depending on the machine model and manufacturer. When considering a brick making machine, it is advisable to consult the manufacturer or supplier for detailed information regarding the cycle time and factors that influence it.

How do you properly install cast iron threaded fittings?

Proper installation of cast iron threaded fittings is essential to ensure a secure and leak-free connection.

Here are the steps to follow for a proper installation:

Prepare the Fittings: Inspect the cast iron fittings to ensure they are clean, undamaged, and free from debris. Remove any burrs or sharp edges that could interfere with the sealing or threading process.

Apply Thread Sealant: Apply an appropriate thread sealant to the male threads of the fitting. Thread sealant helps create a reliable seal and prevents leaks. Use a sealant compatible with cast iron and suitable for the intended application. Follow the manufacturer’s instructions for application and curing time.

Hand-Tighten the Fittings: Start by hand-tightening the fittings together. Begin with the male fitting, and thread it into the female fitting by hand until it is snug. Ensure that the threads engage smoothly and evenly.

Use a Wrench for Final Tightening: Once the fittings are hand-tightened, use a wrench to complete the final tightening. Use a suitable wrench size that matches the fitting’s dimensions. Avoid using excessive force, as it can damage the fittings or cause thread stripping. Tighten the fittings until they are snug and fully engaged, but do not overtighten.

Align and Support the Piping: Ensure that the piping connected to the fittings is properly aligned and supported. Misalignment or excessive stress on the fittings can lead to leaks or premature failure. Use appropriate pipe hangers, clamps, or supports to secure the piping and maintain proper alignment.

Inspect for Leaks: After installation, visually inspect the fittings and connections for any signs of leakage. Perform a thorough leak test by pressurizing the system and checking for any fluid leakage. If leaks are detected, address them promptly by adjusting the fitting tightness or replacing damaged components.

Follow Manufacturer’s Guidelines: Always refer to the manufacturer’s guidelines and installation instructions specific to the cast iron fittings being used. cast iron pipe cap Manufacturers may provide specific torque values, installation techniques, or additional precautions that should be followed for optimal performance and longevity.

It is important to note that the installation process may vary depending on the specific type and size of the cast iron threaded fittings, as well as the application requirements. If you are unsure about the installation process or have specific installation concerns, consult the manufacturer’s documentation or seek guidance from a qualified professional or plumber.

Proper installation of cast iron threaded fittings helps ensure a reliable and durable connection, minimizing the risk of leaks and ensuring the integrity of the plumbing system.

How are cast iron threaded fittings different from other types of fittings?

Cast iron threaded fittings differ from other types of fittings primarily in the material they are made from and their specific characteristics.

Here are some key differences between cast iron threaded fittings and other common types of fittings:

Material Composition: Cast iron threaded fittings are made from cast iron, which is a strong, durable, and corrosion-resistant material. Other types of fittings can be made from materials such as brass, stainless steel, PVC (polyvinyl chloride), or copper, each offering their own unique properties and suitability for different applications.

Strength and Durability: Cast iron threaded fittings are known for their strength and durability. They can withstand high pressure, temperature variations, and mechanical stresses. Cast iron fittings are commonly used in applications that require robust and long-lasting connections.

Threaded Connection: Cast iron fittings have threaded connections, allowing them to be screwed together with other threaded components. This threading enables a secure and reliable connection that can be disassembled if needed. Other types of fittings may use different connection methods such as compression fittings, soldering, or welding.

Application Range: Cast iron threaded fittings are commonly used in plumbing systems, particularly for water supply lines, drainage systems, and wastewater applications. They are often preferred for industrial or commercial projects where durability and strength are essential. Other types of fittings, such as brass or PVC fittings, may be more suitable for specific applications such as residential plumbing or low-pressure systems.

Weight and Cost: Cast iron fittings are generally heavier and more expensive compared to other types of fittings. The weight and cost of cast iron fittings can be a consideration when selecting fittings for a particular application, especially if weight or cost constraints are significant factors.

Machinability: Cast iron is a material that can be easily machined, allowing for precise threading and customization of fittings. This makes it possible to create various shapes and sizes of cast iron threaded fittings to suit specific plumbing system requirements.

It is important to note that the selection of fittings should be based on the specific needs of the application, including factors such as pressure rating, chemical compatibility, temperature range, and system requirements. Consulting with plumbing professionals, referring to industry standards, and considering the specific application requirements will help ensure the appropriate choice of fittings for a given project.

Why is it important to properly lubricate hydraulic pump parts?

Proper lubrication of hydraulic pump parts is crucial for the optimal performance and longevity of the pump system.

Here are several key reasons why proper lubrication is important:

Friction Reduction: Hydraulic pump parts, such as pistons, gears, bearings, and seals, are subject to friction as they move and interact with each other during operation. Lubrication forms a thin film between the moving parts, reducing friction and minimizing wear. This helps to prevent excessive heat generation, reduces energy losses, and extends the lifespan of the components.

Wear Prevention: Lubrication creates a protective barrier that prevents direct metal-to-metal contact between the pump parts. This prevents wear, scoring, and surface damage that can occur due to friction and abrasion. By reducing wear, proper lubrication helps to maintain the dimensional integrity and tolerances of the pump parts, ensuring their long-term reliability.

Seal Integrity: Hydraulic pumps often rely on seals to maintain pressure and prevent fluid leakage. Proper lubrication helps to keep the seals in good condition by reducing friction and preventing drying or cracking. Well-lubricated seals maintain their flexibility and effectiveness, ensuring efficient sealing and reducing the risk of leaks.

Temperature Regulation: Hydraulic pump systems generate heat during operation due to the mechanical forces and fluid friction. Lubrication acts as a heat transfer medium, carrying away excess heat from the pump parts. This helps to regulate the operating temperature and prevents overheating, which can lead to accelerated wear, reduced efficiency, and potential damage to the pump components.

Contamination Control: Lubrication helps to create a barrier that protects the pump parts from contaminants present in the hydraulic fluid. It helps to prevent particles, dirt, and moisture from reaching the critical surfaces and causing damage or blockages. Lubricants with appropriate filtration properties can also help to trap and remove contaminants, maintaining the cleanliness of the system.

Noise Reduction: Proper lubrication can contribute to quieter operation of hydraulic pumps. It helps to dampen vibrations and reduce noise caused by metal-to-metal contact and friction between the moving parts. This can be particularly important in applications where noise reduction is desired, such as in automotive or industrial environments.

It is crucial to use the recommended lubricants specified by the pump manufacturer and follow the recommended lubrication intervals. Over-lubrication or using the wrong type of lubricant can lead to issues such as excessive heat buildup, seal damage, or reduced pump efficiency. Regular maintenance and monitoring of lubrication levels and quality are necessary to ensure optimal performance and avoid potential problems.

By properly lubricating hydraulic pump parts, you can enhance the efficiency, reliability, and service life of the pump system, leading to improved productivity, reduced downtime, and lower maintenance costs.

How can you determine the correct size of a hydraulic pump for an application?

Selecting the correct size of a hydraulic pump for an application requires careful consideration of various factors to ensure optimal performance and efficiency.

Here are some key steps to determine the appropriate pump size:

Define the System Requirements: Begin by clearly defining the hydraulic system’s requirements and operating parameters. china hydraulic motor parts supplier Consider factors such as desired flow rate (volume of fluid per unit of time), operating pressure, duty cycle, and any specific performance criteria.

Calculate the Flow Rate: Determine the required flow rate for the application. This can be based on factors such as the speed of actuators or hydraulic motors, the volume of fluid needed to perform specific tasks, or the rate of fluid transfer in a system. Consider both the maximum and average flow rates to account for varying demands during operation.

Determine the Operating Pressure: Identify the maximum operating pressure required in the hydraulic system. This can be influenced by the force or torque requirements of the actuators, the pressure needed to overcome system losses, or any safety factors. Ensure that the selected pump can deliver the necessary pressure while maintaining adequate safety margins.

Consider Efficiency and Power Requirements: Take into account the efficiency of the pump and the power supply available for the application. Efficient pump selection helps minimize energy losses and optimize overall system performance. Consider factors such as electrical power availability, power source limitations, or the capacity of a hydraulic power unit.

Match Pump Type to Application: Different pump types, such as gear pumps, vane pumps, or piston pumps, have varying performance characteristics and capabilities. Evaluate the advantages and limitations of each pump type in relation to the specific application requirements. Consider factors such as speed, pressure range, control options, and overall system design.

Consult Pump Manufacturer Data: Review the technical specifications and performance data provided by pump manufacturers. This information typically includes flow rate and pressure ratings, efficiency curves, physical dimensions, and other relevant details. Compare the pump’s performance capabilities with the calculated flow rate and pressure requirements of the application.

Seek Expert Advice: If you are unsure or have complex application requirements, consult with hydraulic system experts or pump manufacturers to get guidance and recommendations. They can provide valuable insights based on their expertise and experience.

It’s important to note that selecting the correct pump size involves a balance between meeting the application requirements and avoiding over-sizing, which can lead to inefficiencies and unnecessary costs. Consider factors such as system dynamics, safety factors, and future expansion or load variations when making the final pump selection.

By carefully evaluating the system requirements, considering performance factors, and leveraging expert advice, you can determine the correct size of a hydraulic pump that best matches the needs of your specific application.